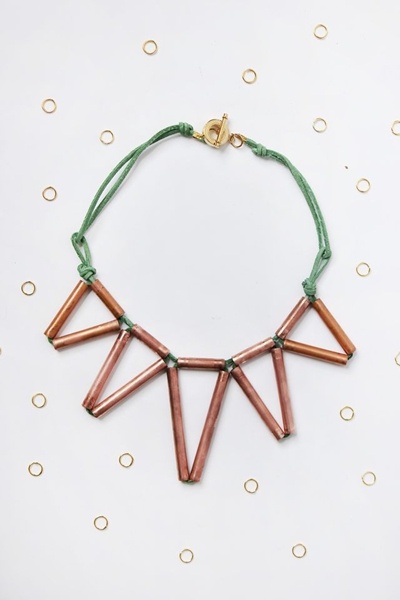
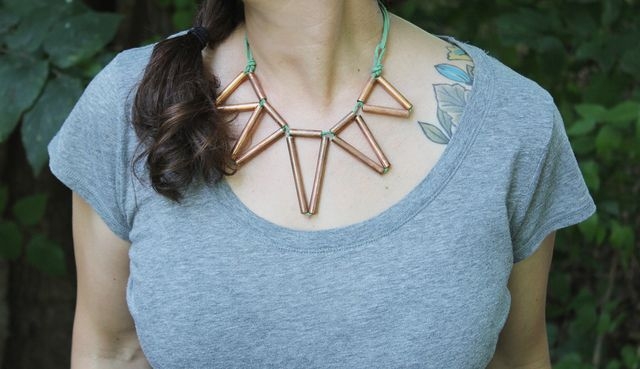
This copper trend, huh! I just can’t quit it! I use a lot of these copper pipes in my personal projects and was experimenting with smaller cuts when they sort of fell together in a triangle and I had a flash of inspiration. I have made a straw bunting before and arranged a himmeli from these same pipes. So the same principle of threading them together to form a shape easily married with the idea of making it into a wearable piece. It feels like a power necklace. I love it!
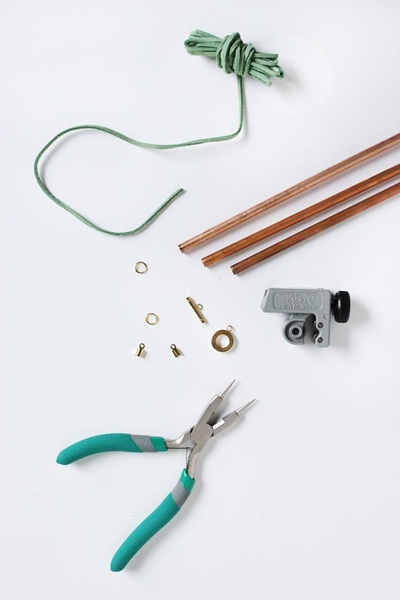
Supplies:
-two 2′ x 1/4″ copper piping tubes
-6′ of leather cord that will fit inside 1/4″ tubes
-jump rings
-10mm rectangular end caps
-toggle clasp and ring
-pliers
-pipe cutter
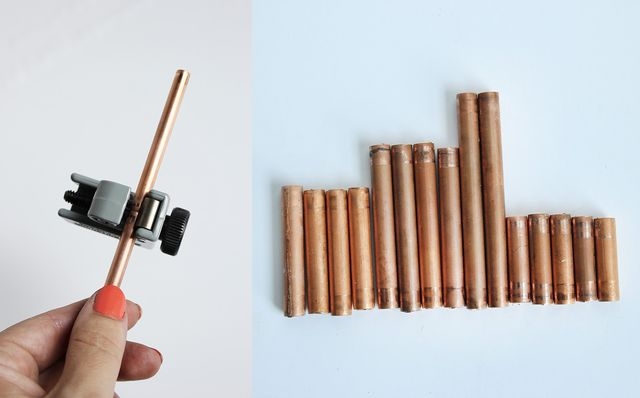
Cut your pipe down accordingly:
5 – 1″ cuts
4 – 1.5″ cuts
4 – 2″ cuts
2 – 2.5″ cuts
 You’ll create five triangles in a row going from smallest to largest and then back to smallest. Tie a loop knot at one end of your leather cord and then string one of your 1″ cuts of pipe over your cord. Follow it up with two of the 1.5″ cuts of pipe. Then loop the loose end of your cord back through the shortest piece of copper in the same direction you originally looped it through. Keep pulling your leather cord through all three pieces until you get them snugly into a triangle shape near the knotted end.
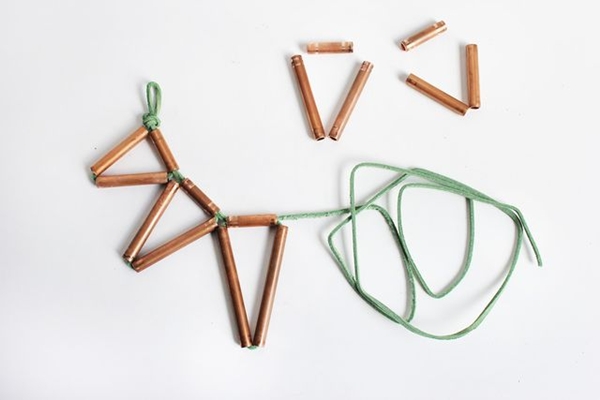 For your second triangle, you’ll repeat the process of adding one of the 1″ pieces but then follow up with two of the 2″ pieces of copper. Run that cord through the 1″ piece for that triangle again and adjust things so that they’re snugly nestled next to your first triangle. Repeat again with another 1″ short piece and your two longest cuts of pipe for your center triangle. Continue in that fashion with your 2″ cuts for your fourth triangle and your 1.5″ cuts for your last triangle.
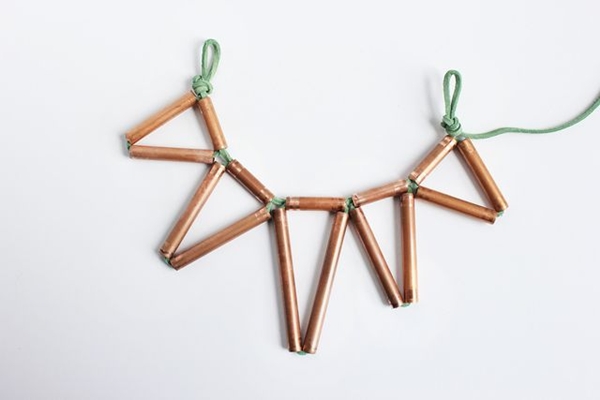
Once you’ve adjusted them all so they are snugly touching top corners, tie another loop knot close to the corner. Trim it so that you have about 1/2″ of a tail.
 Then tuck that tail into the copper pipe so it won’t be flapping around. This creates your bib piece. You’ll use the rest of your leather cord for the straps in the next few steps.
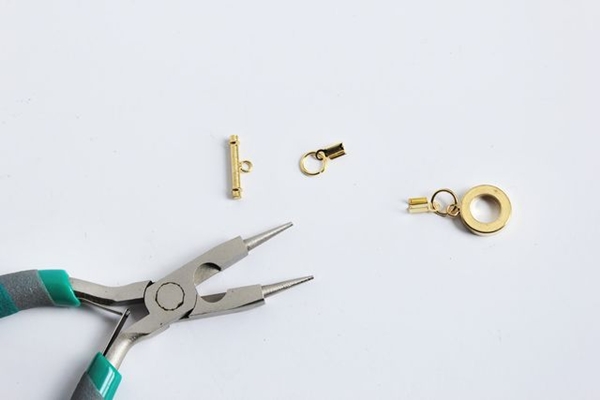 Using your pliers, connect your end caps to your toggle ring and clasp.
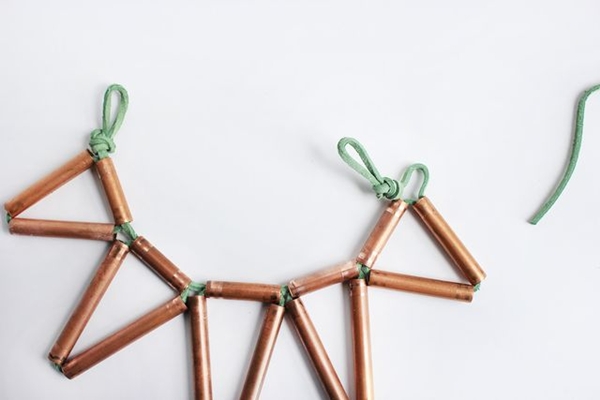
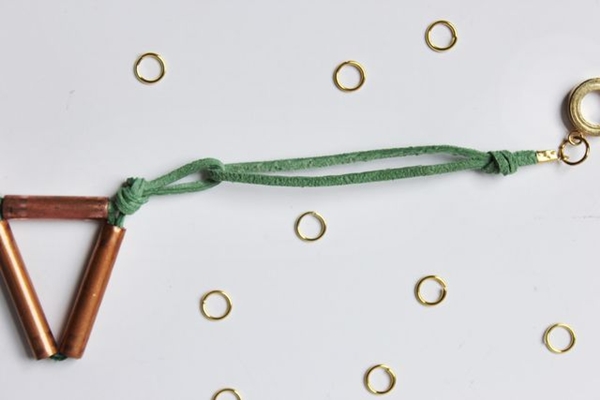 For a necklace that rests on your chest, cut two lengths of leather that are 12″ each. Loop one length through one of the loop knots on one side of the triangles. Bring the two loose ends together again and tie a knot as shown above. Repeat on the other side.
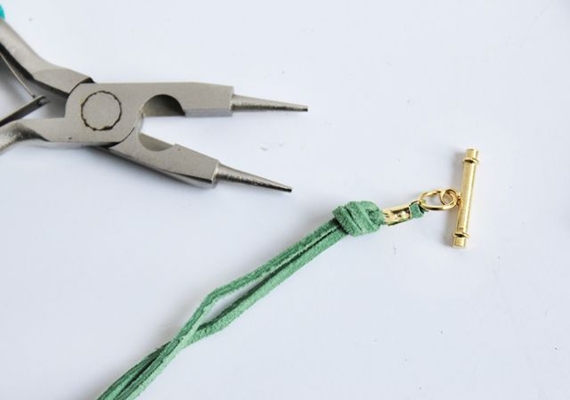 Trim your loose ends so they’re even and about 1/2″ from your knot. Then clamp your end caps over the loose ends with your pliers.
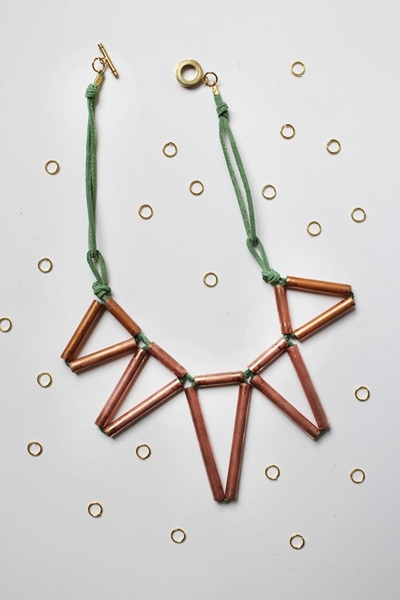
You now have a bold piece from the hardware section to liven up your favorite casual tee and boyfriend jeans. Simplify things a bit and do just one triangle on a longer leather cord for a completely different, yet equally fantastic necklace!