Each celebration is a wonderful opportunity to live creatively and to be creative. The self-created products are used quickly and are presented immediately. The original decoration makes for a good mood at parties and parties.
Surprise your guests with original and stylish decoration, if you make them from paper to Halloween.
We offer three simple instructions for imitation.
Halloween tinkering with paper – Stylish hallowe decoration made of crepe paper.
Homemade decoration is not always cheaper than the items you get under the party supplies. However, it is more beautiful and adapted to the style of living. This results in a coherent overall image that contributes to the solemn atomic sphere. Halloween is on the door and is just a good opportunity to present the attention to detail in the best light. We have selected the paper as a very suitable craft material.
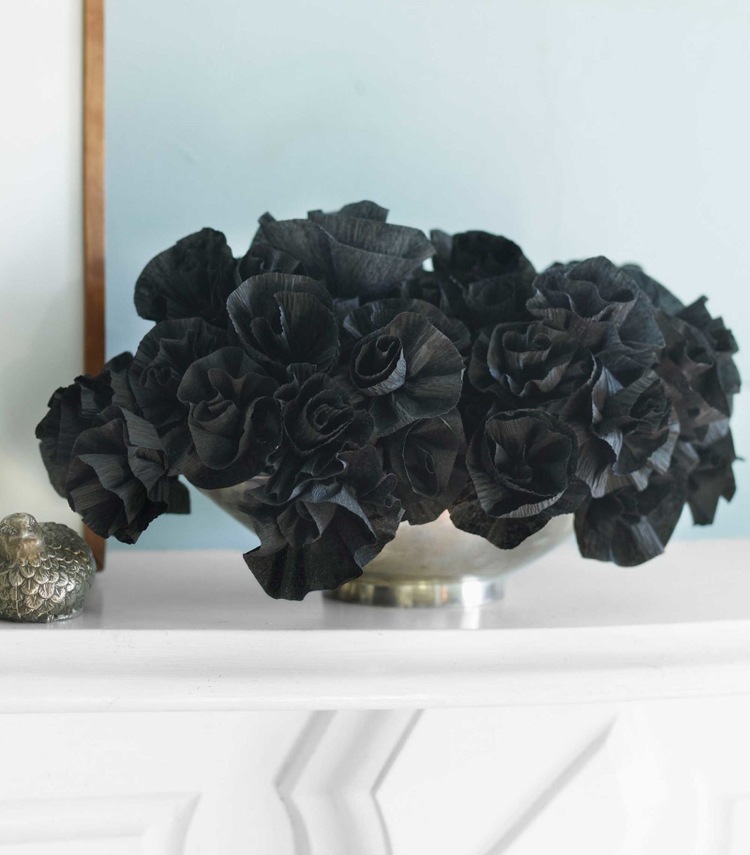
Halloween crafting with paper – Stylish turquoise in dark black itself.

The celebration still begins at the front door. The guests can be greeted with delicious welcome drinks and invited to the party in the house. Therefore, it makes sense that the Halloween decoration just starts there. Decorate the front door stylishly with a themed turquoise from crepe paper, which can be designed very simply.
Halloween crafting with paper – turquoise instruction.
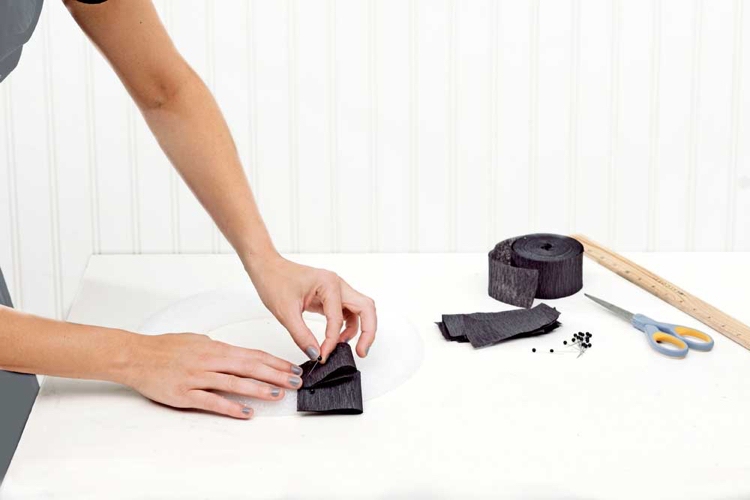
Characteristic colors for Halloween are black and orange, but you can experiment with other color combinations. In our example it is only used with black crepe paper. Cut into several equal-sized rectangular pieces. Obtain a wreath, usually made of styrofoam. Needles are also required – either with black head or all steel.
Halloween tinker with paper – Black turquoise from crepe paper.
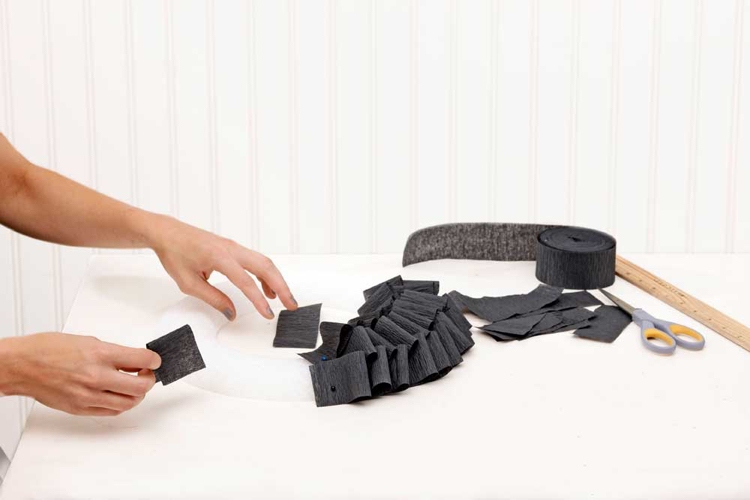
Each piece of crepe paper fold a two so that a loop forms and insert into the crown support with pin. There should be a kind of frills. Proceed as long as the entire surface of the crown is covered. Try to keep the same distance between the individual elements, so that a uniform structure results.
Turquoise to Halloween tinker with crepe paper and wreath.
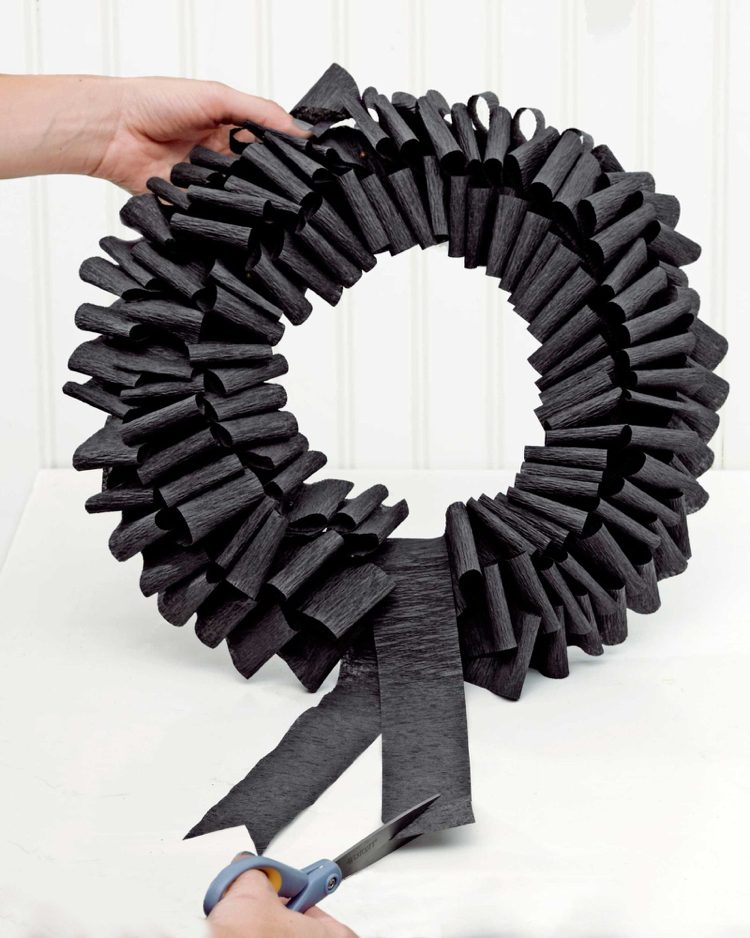
In the lower part of the crown, tie a loop of crepe paper or other material of your choice. You can add some color to the turquoise design if you decorate with an orange ribbon. The base of the styrofoam can be easily attached to the door – with double-sided adhesive tape or adhesive pads.
Halloween tinker with paper – witchbush plug.
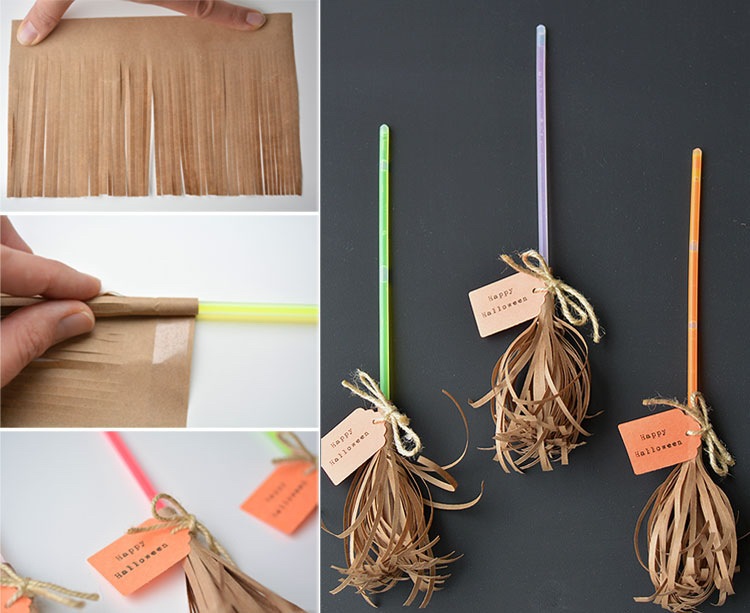
With paper you can create great plug-ins for Halloween. Party cocktails, biscuits and serving plates are festively decorated. Make your own spirited witchbows that fit the topic.
Halloween tinkering with paper – Materials needed.
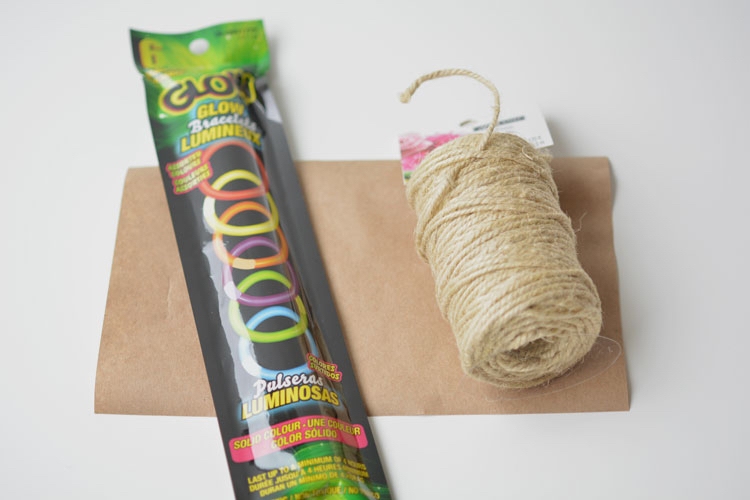
What is needed is bright straws, which are definitely for the good mood, but it goes also with the conventional. A sheet of brown paper and cord, as well as cardboard in orange are still needed.
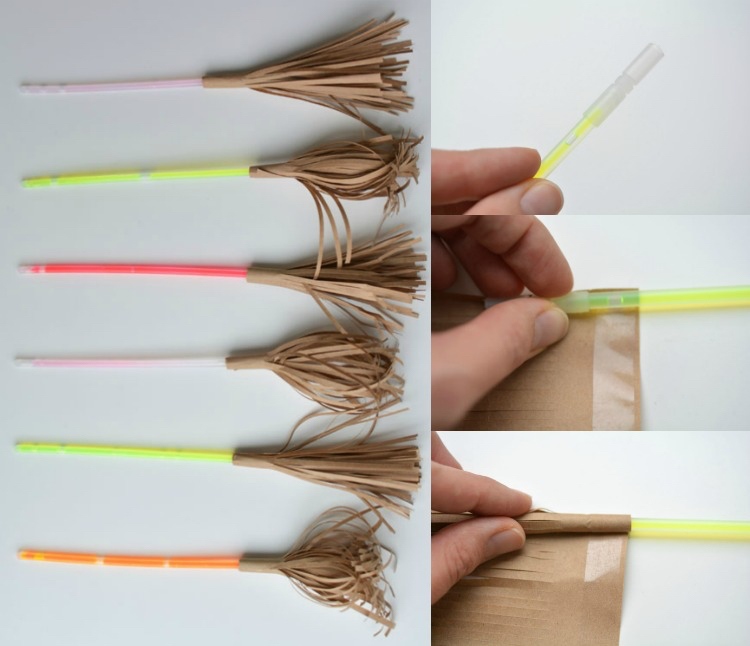
Halloween tinker – cut fringes into brown paper.
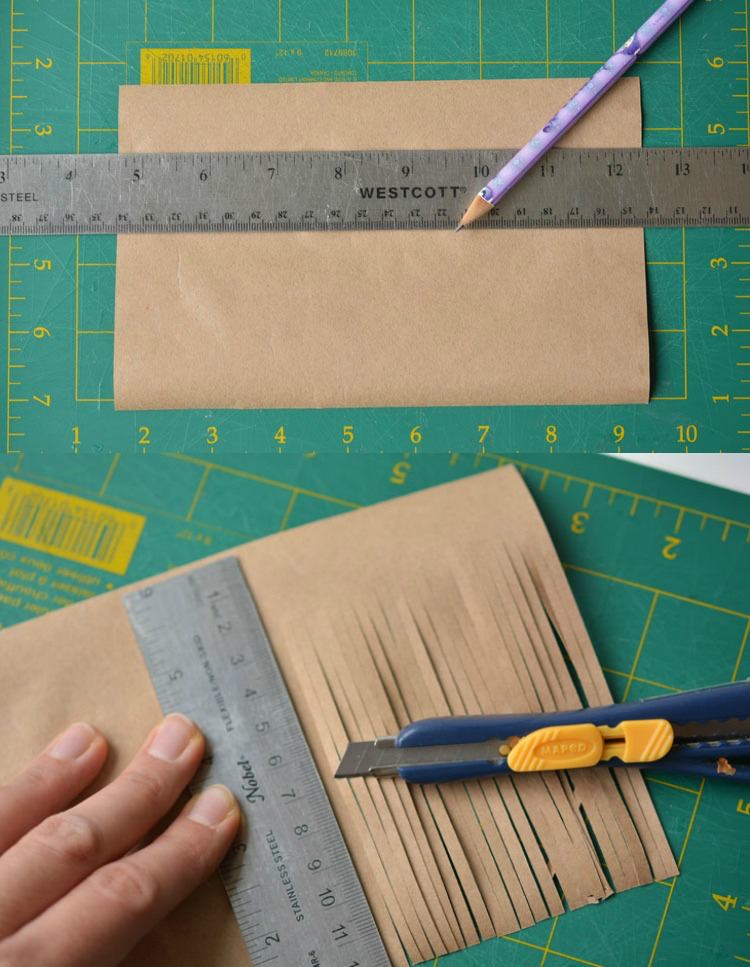
A straw is used as a broom handle and the broom bristle is made of brown paper. Therefore, take a piece of paper and cut it into fringes, but not to the end on one side. Then attach double-sided tape and fix on one side of the bright straw. It will work quite simply if you roll the straw into the sticky area and apply a slight pressure.
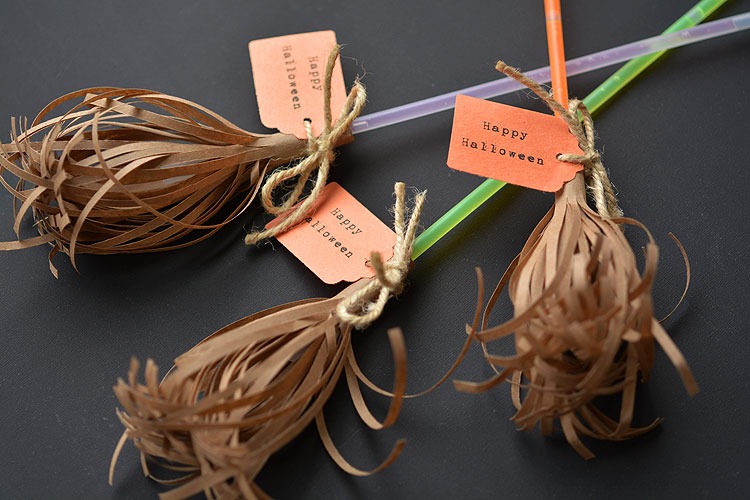
Halloween tinkering – Decorating luminous straws like witches’ bees.
Halloween crafting with paper – Thematic labels punching.
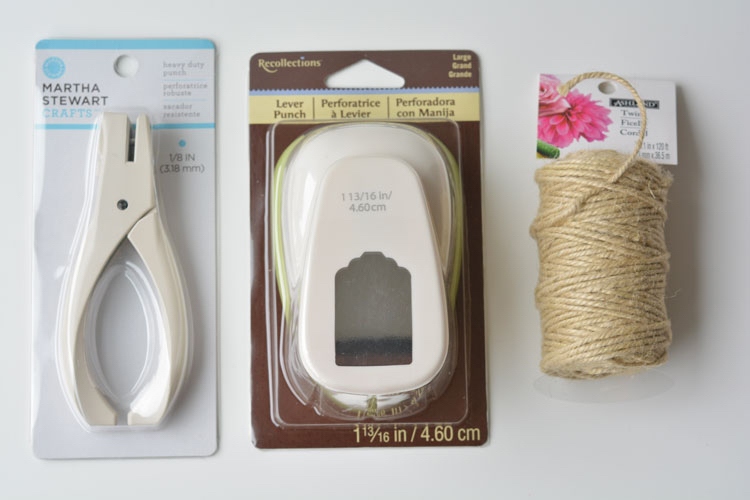
Apparently, the witch’s beard looks ready, but the important details are still missing. Make beautiful labels that bind you to every little broom and thus make the decoration look right. For this you need a motif punch, punch punch and a cord. In the example, the punch is selected with a label motif, but you can use one of your choice.
Halloween tinkering with paper – making labels with motifs by yourself.
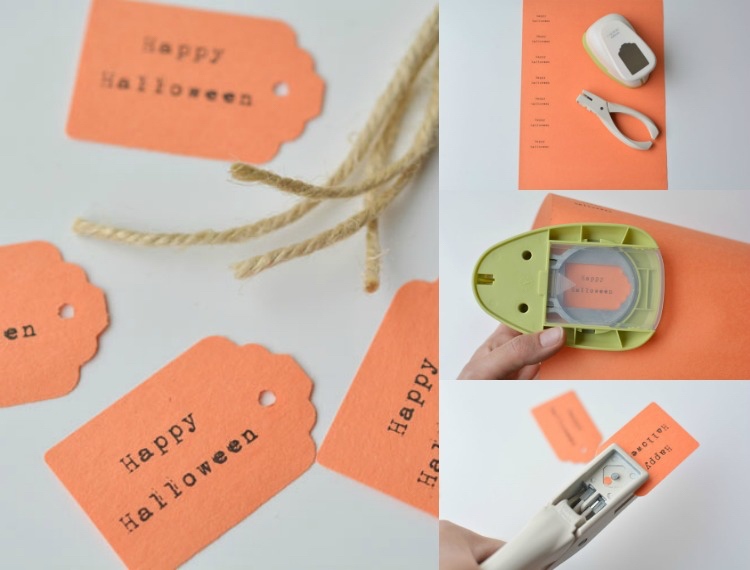
Use a carton in orange as it is just perfect for Halloween. Before you die, you can label the labels festively. This can be done with a computer and printer or with a typewriter, otherwise write it out manually. Stamp cardboard as many labels as the witches’ bees and bind them to a witch’s broom.
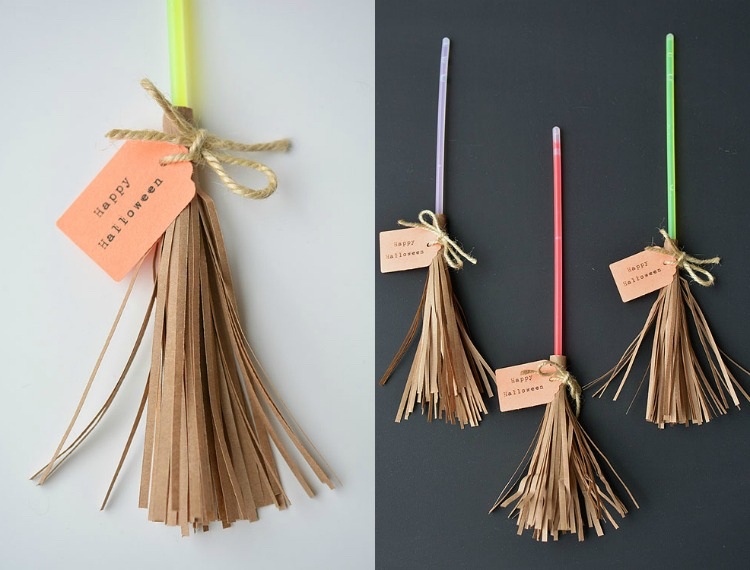
Original Halloween plug-in – luminous witchbush.
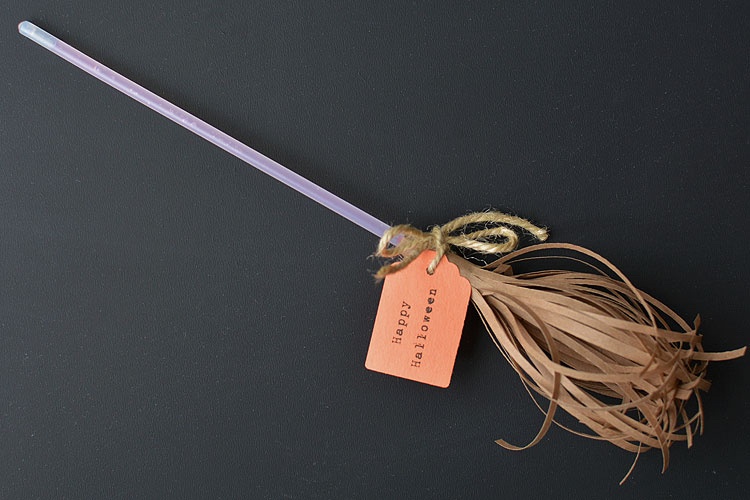
The Witches’ Bears can be perfectly inserted into the table decoration and inserted as a pleasing decoration in the snacks and party food. You can also give it to your guests as a small companion. However, the right effect comes when the lighting goes out and the broom handles light up in the dark.
Use paper and shining straws to create witchbush plug-ins for Halloween.
Creative ideas for Halloween tinkering – Witchbab plug-in.
Spooky decoration font at the door to Halloween tinkering – instruction.

Decals always look for a look and are considered a stylish decoration with individual touch. The decorative letters can be used to present a variety of keywords and monograms as a harmonious decoration in the house. Thematic for Halloween are slogans, such as Boo, Spooky, ‘Trick or Threat’ and others from the English. All you need are the corresponding letters, which can be found in every craft store.
Halloween tinkering with paper – decorating characters.
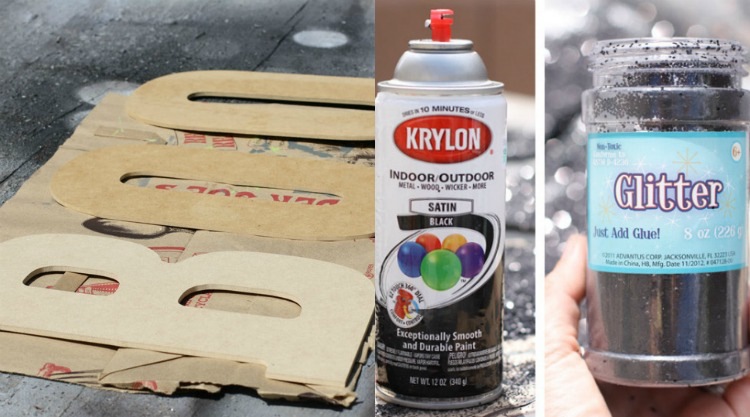
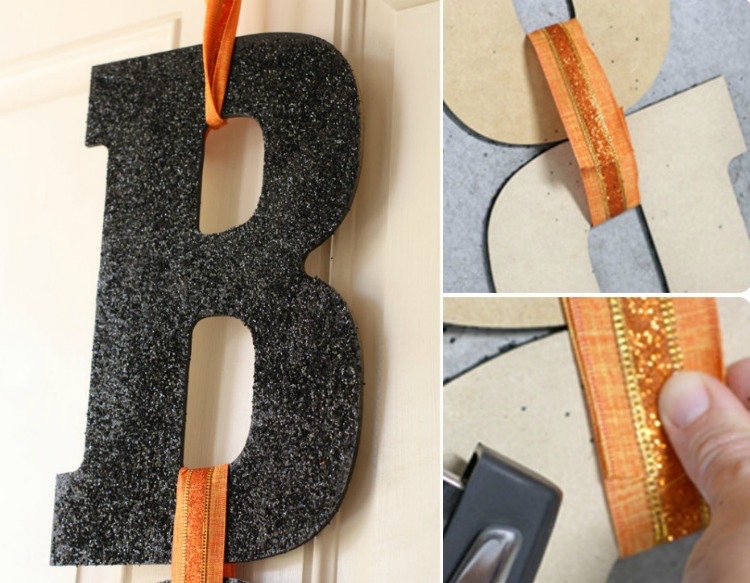
The decoration boards are made of materials such as styrofoam or cardboard, also gladly as a volume body or box with lid. Take the one you like and color it in black or any other color matching the theme. If the paint dries completely, perhaps after at least 12 hours, you can treat the surface with spray paint and then sprinkle with glitter and glitter. Finally, use a suitable varnish spray.
Decals in black with glitter to Halloween tinker.
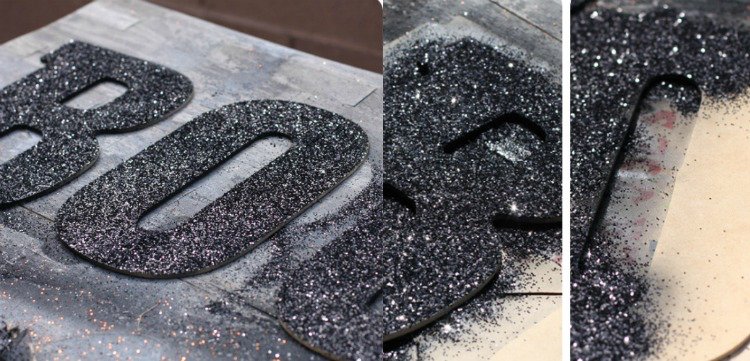
The next day, when the surface is dry and non-sticky, you can tie the decobels together and fix them to the desired place. The letters thus designed can be attached to the door or placed elsewhere.
Moody Halloween decorations.
By DIY Masters 24.10.2016