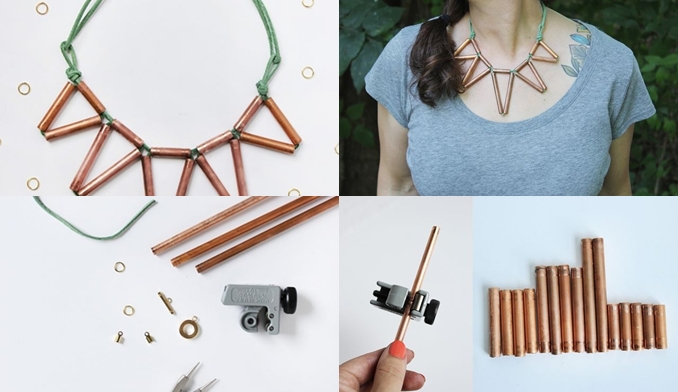
The weaving trend is here to stay, folks. I’ve noticed a handful of woven necklaces pop up in my Instagram feed this summer and couldn’t wait to try my hand at one.
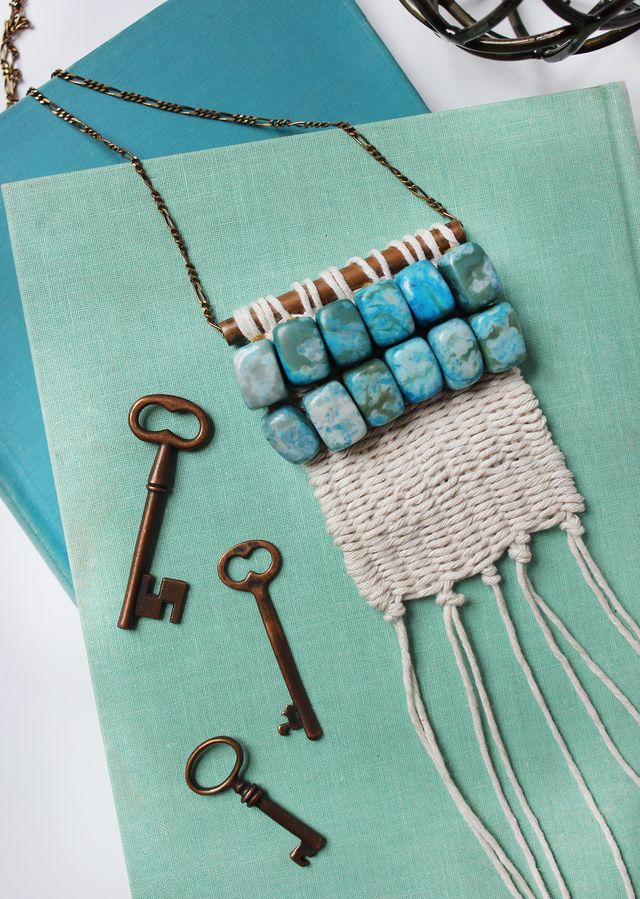
I wanted something that was simple but special, so I kept the color scheme neutral and added some substance with the copper pipe and turquoise beads. It’s got a little bit of a California summer vibe. I always miss the Golden state in the summertime, so I’m gonna wear this necklace all month and pretend I can hear the sound of seagulls and ocean waves.

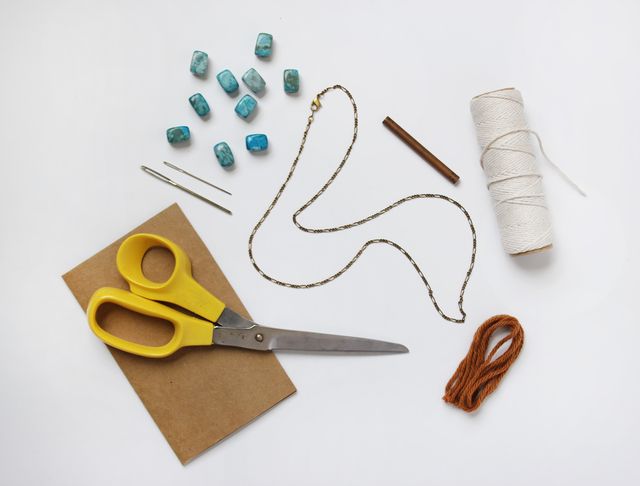
Supplies:
-necklace chain at desired length
-4″ of copper pipe
-cotton twine
-yarn (optional)
-thick cardboard measuring about 5″ x 7″
-12 turquoise stone beads
-tapestry needle for weaving
-hand-sewing needle for threading through the stones
-thread in coordinating color
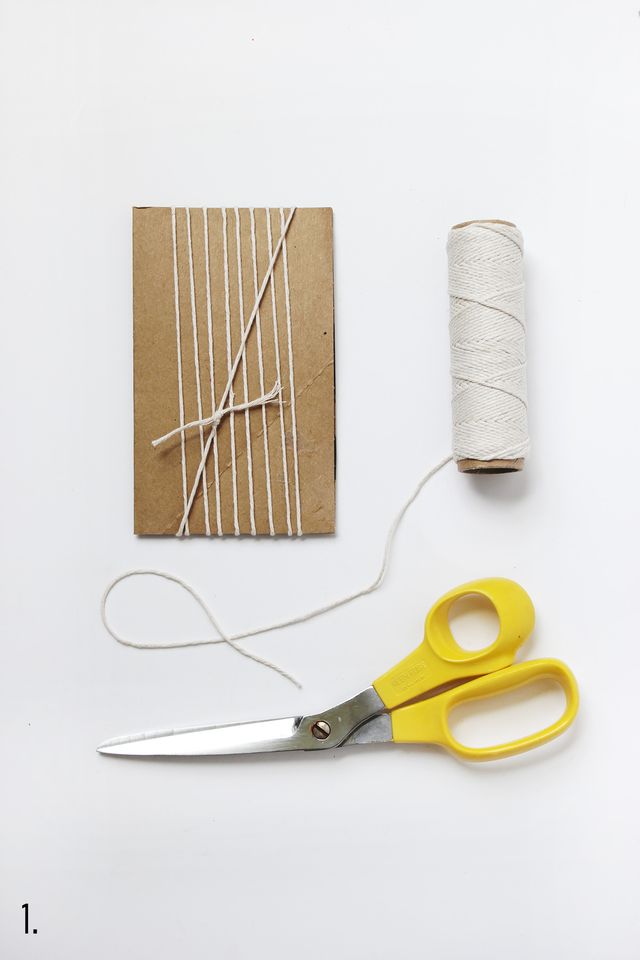
Step One: Cut out a thickish piece of cardboard that measures about 5″ x 7″ and wrap your twine around so that you have 10 rows on the front side. Tie your two ends together in a knot on the back side. This is your warp.
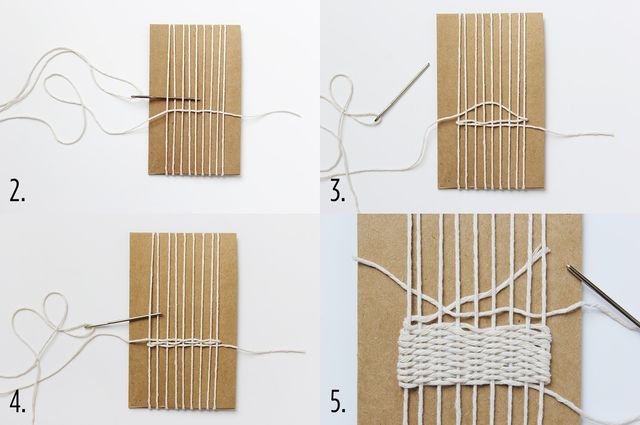
Step Two: Cut a second strand of twine (or yarn if you want a different color) and thread it through your tapestry needle. This is called your weft. Starting from under the second warp row on the right, go over and under with your needle until you get to the left side. Wrap around the warp and weave over and under back to the right side. It should be the opposite of the row you just did.
Step Three: When you pull your twine through on each new row of weaving, pull up at an angle and then down so you get a hill shape in the middle. Then gently pull it down in the center of the hill so that it lays flat. Pull the rest of that row down so that it lays flat against the previous row. Making the hill gives you a little slack so you’re not pulling your rows tighter and tighter as you go. This trick will help you avoid the hourglass shape.
Step Four: Here is your row pressed flat. Continue going back and forth and over and under until your twine has almost run out or you’d like to change colors.
Step Five: I ended my twine with a 3″ tail that I tucked under the warp. If this were a lap or table loom, it would hang down a bit more. To start a new length of twine (or new color), I tucked in the start of my next cut of twine about 3″ under the same warp row where my last section of twine ended. They criss-cross underneath the third from the left. Imagine it’s like they’re tied together and the new one is picking up where the old one left off. You can later stitch these into your weaving on the back side or cheat a little and tie them in a double knot.
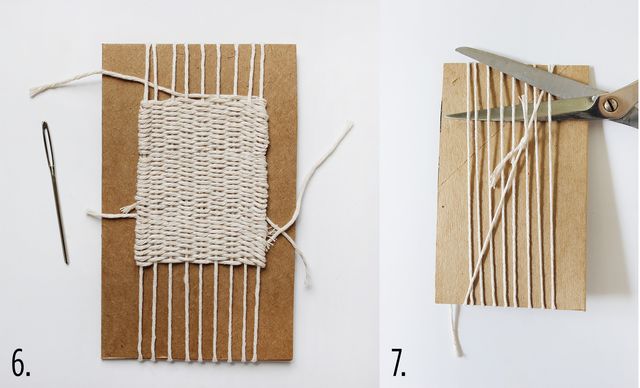
Step Six: Keep weaving until you’ve got yours as long as you’d like. You’ll want to leave a little room at the top and bottom for your warp strands to be empty as you’ll need that space to tie your knots.
Step Seven: Flip your cardboard loom over to the back side and cut your warp threads about 1″ from the top. This will ensure there’s a little more fringe at the bottom.
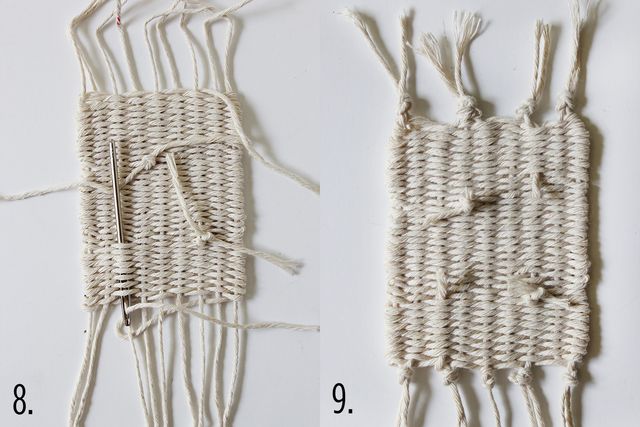
Step Eight: Gently re-thread the loose tail of your starting length of twine and stitch vertically through a few rows of weaving. This will help lock things in place without unsightly knots on the back. Repeat it with the ending length of twine as well. You can do this with all of your loose ends or you can double-knot the ones that are near each other.
Step Nine: I only wrapped my weaving nine times so I ended up with nine strands, but I suggest doing ten so you have an even amount to tie off. Tie a snug double-knot between every two warp threads along the top and bottom to help lock in your weaving.
Step Ten: Take your thread and sewing needle and fold the top knots back to the back side. Carefully stitch them down without stitching all the way through your weaving. This will provide a nicely finished top edge.
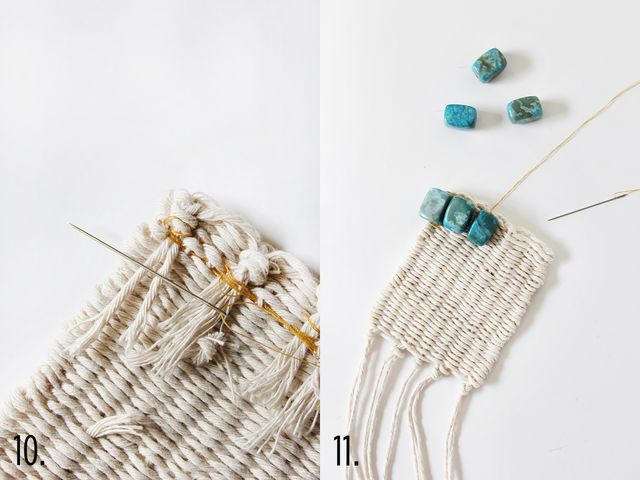
Step Eleven: Then stitch your stones in place using the same needle and thread. I suggest stitching one stone at a time instead of using one long thread in case one breaks. Then you’ll only lose one instead of all of them. I did two rows of six but you could easily adjust that.
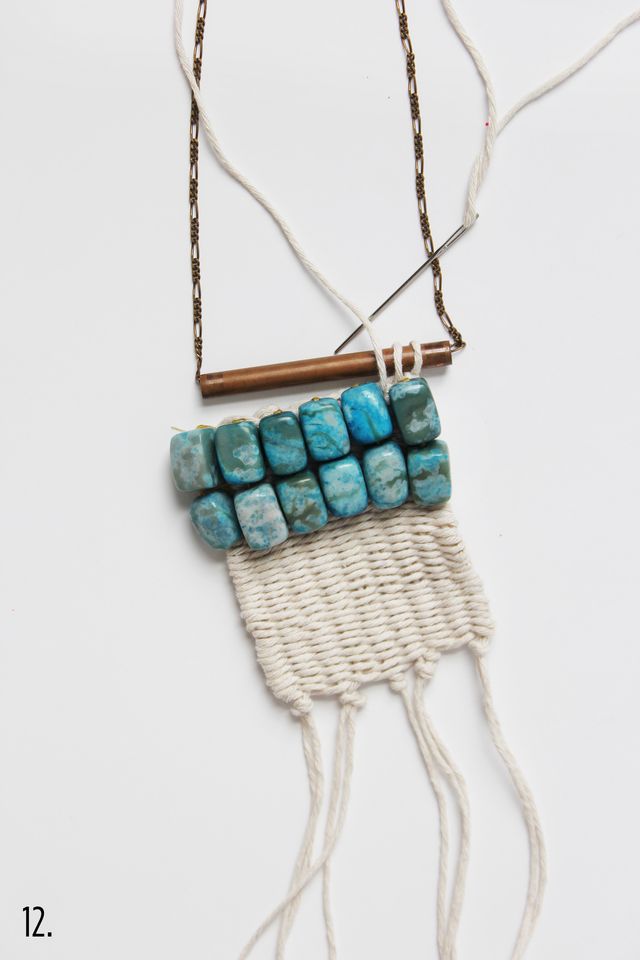
Step Twelve: Thread your chain through your copper pipe and then cut another length of twine about 2′ long. Stitch it through one corner of your necklace under the double-knotted warp and then continue stitching across to the other side. Be sure to get under the warp knots as often as you can to help it keep it’s shape.
You can customize the width and length of your necklace depending on the size of your cardboard loom. You can also use different colors for your warp and weft for a more colorful or casual effect. Add more texture with wool roving or a variety of beads. It’s one of those perfect Sunday afternoon projects that will leave you with a piece of jewelry that looks like a boutique treasure from your last vacation. Now lets all start planning our road trip to the beach.