It’s no secret I love flowers – in my apartment, on my desk, or as a pattern on my dress.
Pressing fresh flowers is a great way to preserve their natural beauty, and by decorating your phone case with them, you can showcase their vivid colors and add a little touch of nature to an otherwise ordinary gadget.
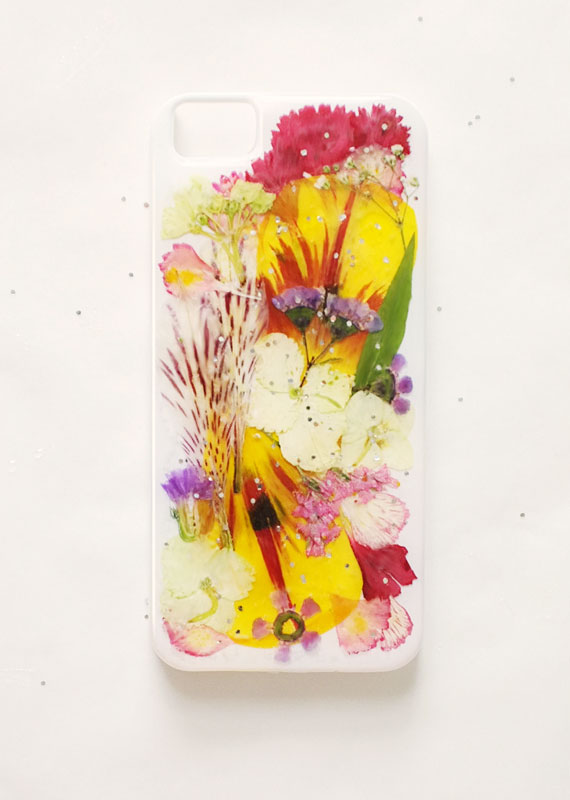
You can make your own pressed flowers with a flower press or by placing them inside a large book, like an encyclopedia or phone book. If you are pressing your own flowers, keep in mind that the drying time takes a little while – usually a minimum of seven days. You can also find pressed flowers right here on Etsy. For this project, I used carnation petals, baby’s breath, tulip petals, statice, wax flowers, hydrangeas and alstroemeria petals.
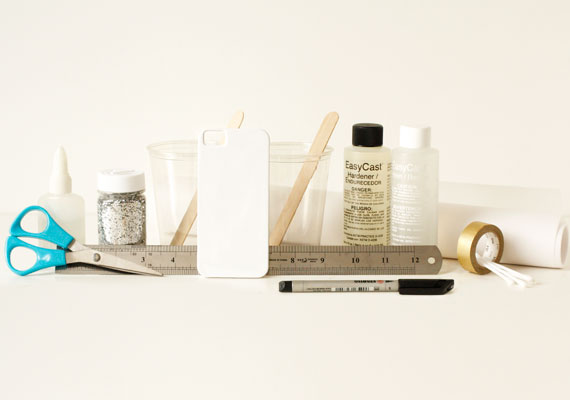
You will need:
Pressed dried flowers
Flat, solid white iPhone case
Clear craft glue
A flat and level work surface
Tape
Scissors
Parchment paper
Ruler
Thin-tip permanent marker
Timer
2 clear plastic cups
2 wooden craft sticks
50/50 clear-casting epoxy resin (I used Easy Cast)
Acetone (or a nail polish remover with acetone)
Q-tips
Glitter (Optional)
Step 1: Arrange the Flowers
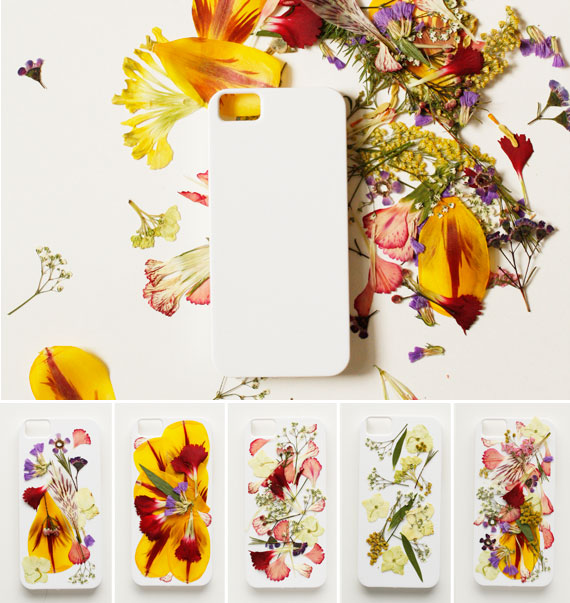
To get started, place the pressed flowers on your case and play around with different flower arrangements. If you want to add a lot of flowers to your case, make sure that they don’t pile up higher than 1/16th of an inch (approximately 1.5 mm) or you won’t be able to properly coat the case in resin. Keep in mind that your pressed flowers will become slightly translucent once they are coated in resin, so placing lighter colored flowers under darker ones works best. Once you have found an arrangement you like, take a snapshot of it for future reference.
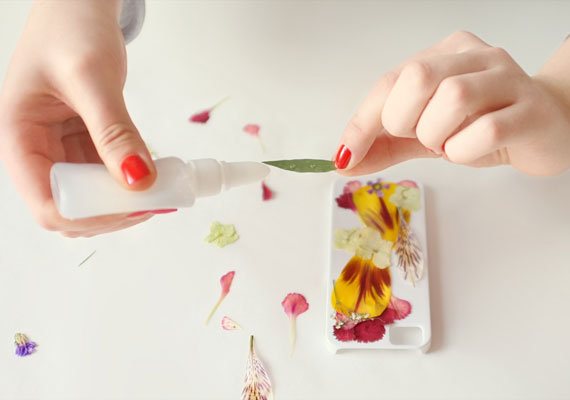
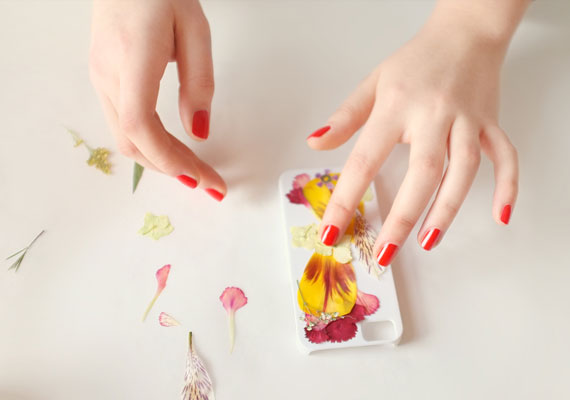
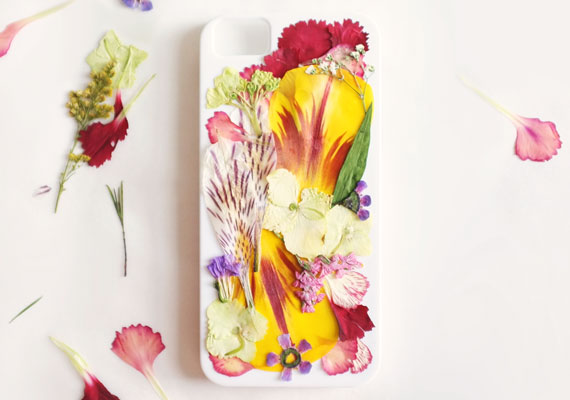
Remove the flowers from the case and set them aside. Dab a small amount of glue on the largest flower and carefully glue it to the case. Follow suit with the rest of your flowers until your arrangement is complete.
Step 2: Prepare the Resin
Make sure you are in a well-ventilated area. Cut a 2 ft long (approximately 60 cm) piece of parchment paper with your scissors and tape it down to your flat work surface. Take your resin and read the directions carefully. (Note: If the directions for your resin differ from the steps below, make sure to follow the directions for your resin or you’ll end up with a sticky mess, and that’s no good for placing a flowery phone call!)
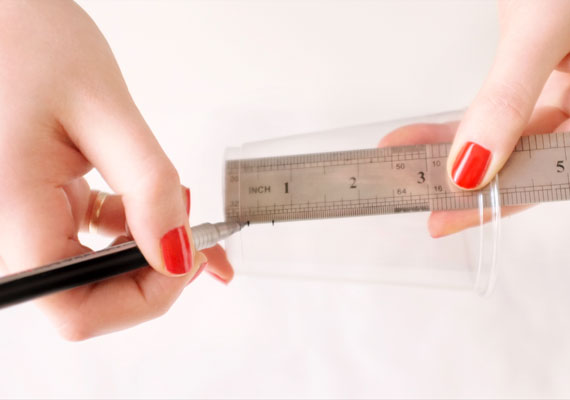
Put your ruler inside a plastic cup and mark the cup twice using a thin permanent marker. Your first mark will be at 3/8 of an inch, and your second will be at 3/4 of an inch.

Set your timer to 2 minutes and have a craft stick ready for stirring. Slowly pour resin into the cup up to the 3 /8 inch line. Keep in mind that an accurate pour is crucial, so don’t be too generous with your pour. Next, slowly pour the hardener to the 3/4 inch line, making sure to not go over it.
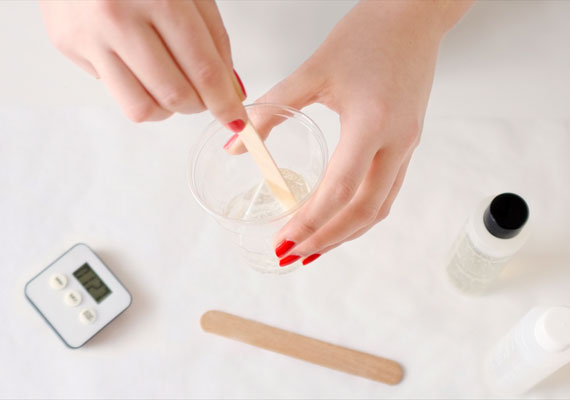
Start the timer and stir the contents of the cup with your craft stick for 2 minutes, making sure to scrape the sides of the cup from time to time. Don’t worry if you see lots of bubbles forming in the cup – they’ll disappear later. When the timer goes off, place the second plastic cup on your work surface and have your second unused craft stick ready for stirring. Optional: If you would like to add glitter to your case, sprinkle some into the mix now.
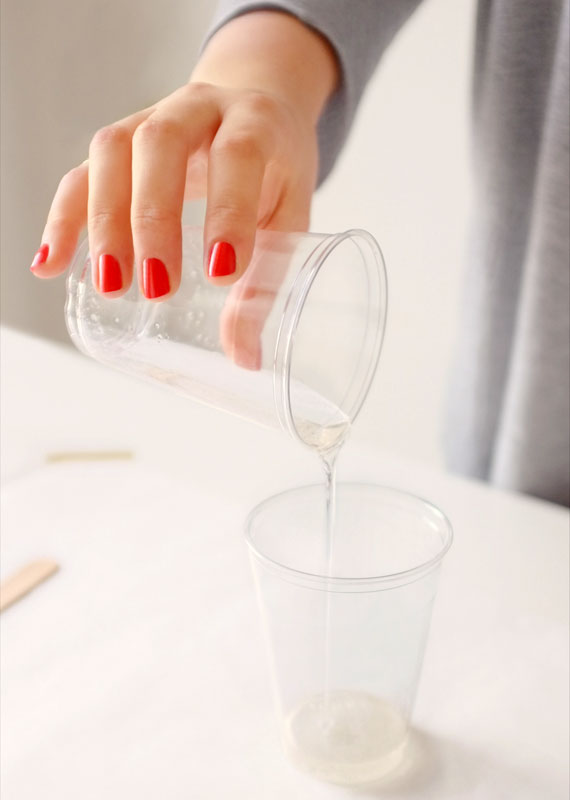
Next, set your timer to 1 minute and pour the contents of the first cup into the second cup. Continue stirring until the timer goes off. Let the resin rest for 5 minutes.
Step 3: Add Resin to the Case

Slowly pour a small amount of your newly mixed resin onto the center of your case. It’s always better to err on the side of caution and add too little resin than too much.
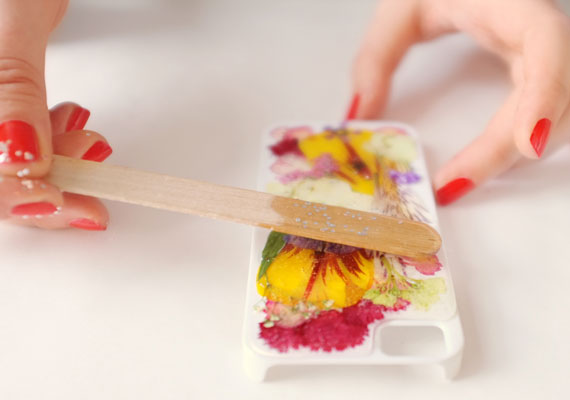
Spread the resin close to the edge of your case using your craft stick. Make sure the resin does not go over the edge. Add more resin to the case until the entire back and all the flowers are covered. Lightly blow on any bubbles that show up on the surface to help them disappear.
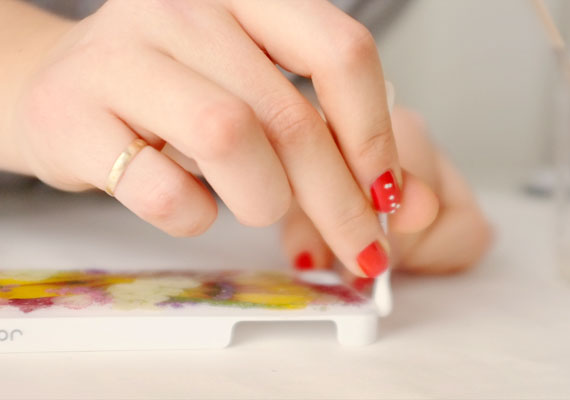
Set the case down on the parchment paper and keep an eye on it as it dries (about one to two hours). If any resin spills over the edges, dip Q-tips in acetone and wipe clean.
Once your first coat of resin has dried, examine your case to make sure all the flowers have been properly coated. If needed, add a second coat of resin.
Voila! You now have an embellished floral phone case to brighten up any conversation.